Guide
Labels
Labels are free-form tags you attach to transactions — group spending by project, person, or event, and read the totals per label on the Labels tab.
A label is a free-form tag you attach to a transaction on top of its account and category. A category answers what kind of spending is this?; a label answers what was this for? — a trip, a project, a person, an event. One transaction can carry several labels, and one label can sit on any number of transactions, so a label becomes a running tally that cuts across accounts and categories.
What labels are
Labels are plain names you create yourself — there is no fixed list to choose from. A label is stored per transaction, and the app offers every label you have used anywhere, so once you create one it is available on every other transaction. Labels are independent of categories: the same expense still belongs to one category, but it can be tagged with as many labels as you like.
Why labels help
Categories describe what money is for; labels describe what an entry belongs to. That second axis is what lets you answer questions a category report cannot:
- Tracking a project or a client — tag every related entry
Freelancingand read that client’s total in one place. - Following an event or a trip — tag food, fuel, and hotels
Vacationto see what the whole trip cost across different categories. - Marking spending by person or purpose —
Family,Birthday, orHome Improvement, regardless of which account paid.
Because labels cut across accounts, categories, and dates, they work as a lightweight project tracker without changing how your transactions are classified.
Adding labels to a transaction
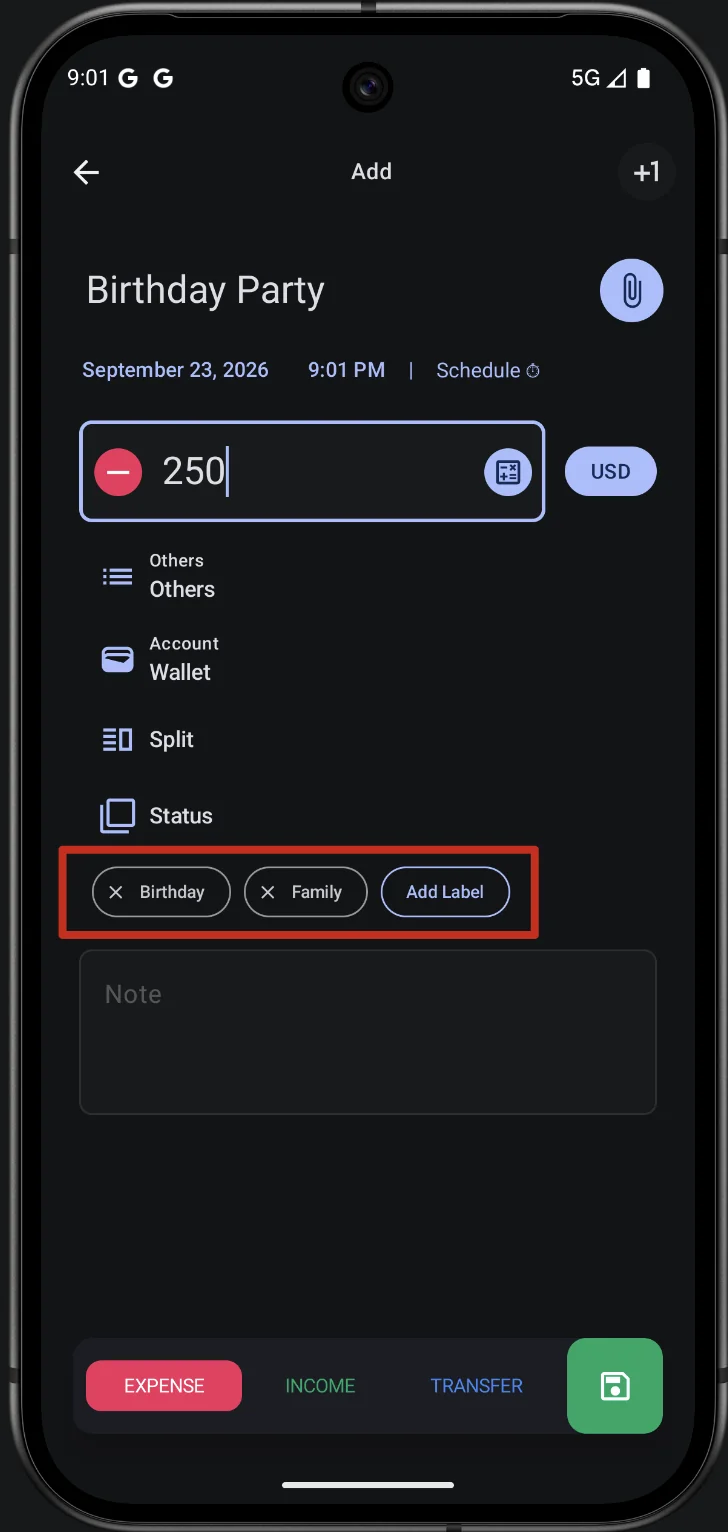
Open a transaction and use the Add Label button under its category and status rows. The picker lists every label you already have; tap one to attach it, or type a new name and add it on the spot. Attached labels appear as chips you can remove with the small close icon. The transaction form is described in the transactions guide.
Managing your labels
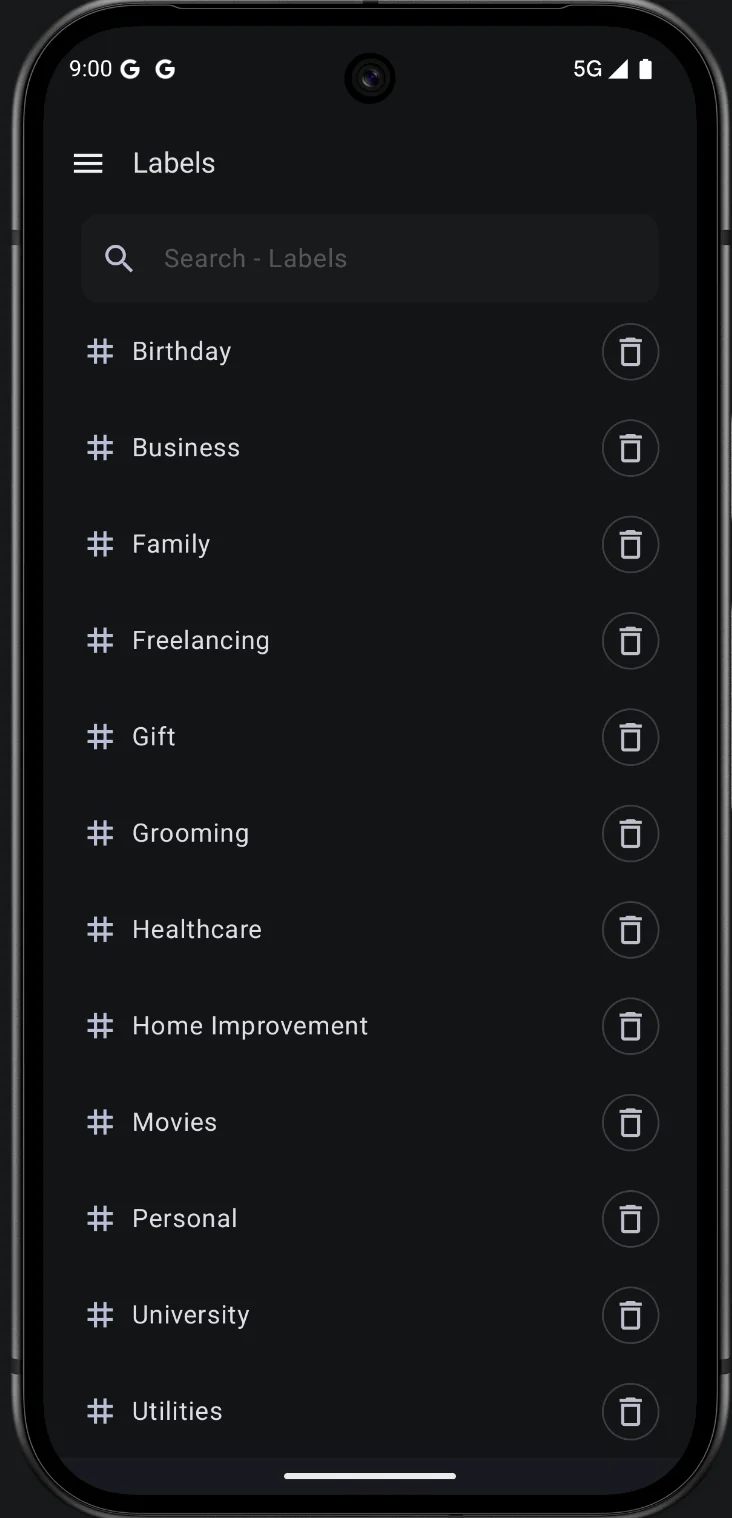
The labels screen — the Drawer > Labels entry — is where your label vocabulary lives. Type a name into the search field to create a label, tap a label to rename it, and use the trash icon to delete it. Deleting a label removes it from every transaction that carried it, so delete only a label you no longer need.
Labels on your transaction lists
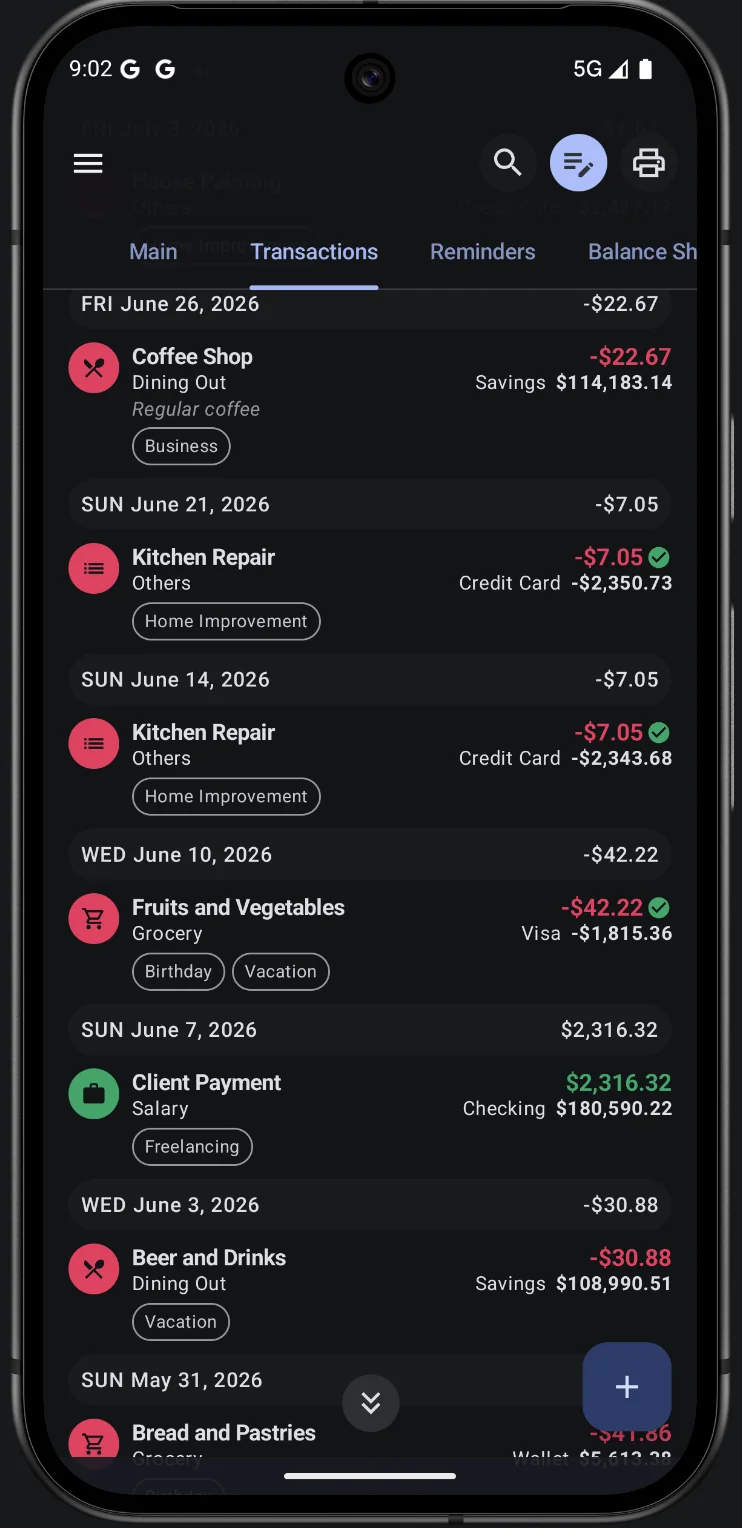
Once a transaction carries labels, they appear as chips under its row in the transaction list, so you can read the project or event an entry belongs to without opening it.
The Labels tab
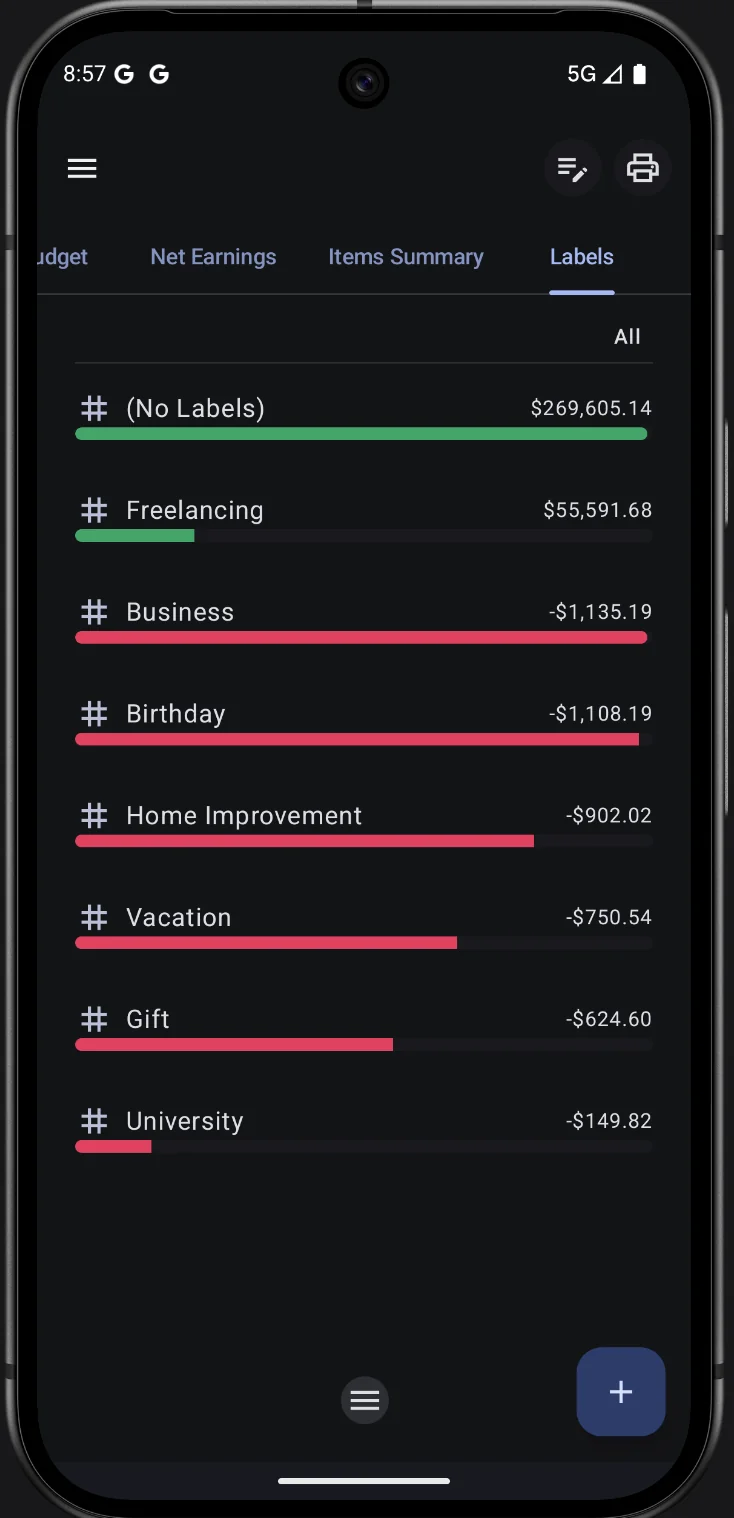
The home screen’s Labels tab totals your transactions per label for the selected date range. Each row is one label, with its amount and a bar scaled to the largest label; the (No Labels) row at the top groups every transaction that has no label. Tapping a row opens that label’s transactions, and the filter and print actions work like they do on the other report tabs.
Travel mode
Labels are what travel mode hides. When you switch travel mode on in the drawer, you choose the labels to hide and every transaction carrying them drops out of the app’s views until you switch it off. It is a viewing state only — nothing is deleted or changed. See the travel mode guide.
Related
- Travel mode — hides the labels you choose while you are away.
- Transactions — where labels are attached and where they appear on a row.